

Before adding content to a website, nearly all copywriters will create their first few drafts on a different platform beforehand. The most popular tool for this by far is Microsoft Word, which I’m sure you’re fairly familiar with.
To maintain its popularity, Microsoft Word includes features that make copywriting tasks much easier for those using it.
Let’s a look at some of these features in more depth to evaluate how Microsoft Office can help us to work faster and more efficiently.
1. Tracking changes
When reviewing a draft you’ve written, or a draft that a colleague has written, tracking changes can be essential to see which changes have been made and where mistakes have been rectified.
To track your changes, simply select the “Review” tab.


Then, click the “Track changes” button.


You will then notice that wherever you make any changes, vertical lines will appear to the left of the page.
If you click the red line, it will show you the changes made (e.g. deleted words, added words, formatting) with crossed out words and comments where applicable.
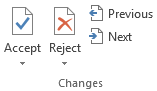
You can then either accept changes (either all at once or one by one) and stop tracking, or reject the changes and revert the document to its original form.

Tracking changes is also useful when you’re making changes to a client’s existing content. It shows them exactly what changes you have made and pinpoints their locations within the document. This not only makes it easier for all parties involved in the task, it also justifies your work.
2. Adding comments
Tracked changes are always recommend when there are typos in the document, or grammar issues to rectify.
However, there may be times where you’re not sure what the writer intended, or whether the inclusion of certain phrasing is appropriate for the type of thing you’re writing. This can save you from deleting text that the intended party would rather keep, instead of jumping the gun.
In these instances, you can highlight text within a document to add your question or query in the form of comment. These comments can then be reviewed at a later time, and even answered within the comment itself.
To make a comment, click the “Review” tab.
![]()

Then, simply highlight a piece of text (or even a whole section of the document)
![]()

Then, select “new comment” under the “Review” tab.


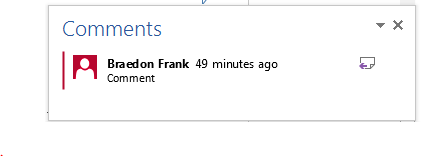
Finally, a box will appear to the right of the document in which you can enter your feedback – leaving a speech bubble icon there to be clicked on by any user who has the document open.

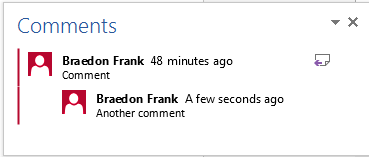
If you, or anyone else who has access to the document, want to add an additional comment, simply click the “Reply” button within the comment:

To delete a reply to a comment, simply right click it and select “delete comment”.
The same rule applies with comments across the document, but once content is approved and finalised, you can delete all comments quickly by selecting the downward arrow under “Delete” in the “Review” tab.
This helps to tidy things up and avoid reader confusion as to what has been done and what needs to be done. It also limits the possibility of the client being distracted by needless back and forth commentary between editors of the content.
3. Erase all formatting (ctrl + a to select all)
This one’s simple – and definitely effective if you’ve copied a large amount of text from a website.
In order to avoid any formatting issues, simply highlight all the text in your document (press “ctrl” and “a” buttons on your keyboard at the same time), then select the “Clear All Formatting” button in the home tab. You will now be ready to make changes to the text without multi-coloured borders and exceedingly large or small text interfering.
You can find this button under the default “Home” tab.


It is the button that displays an “A” next to a pink eraser:
![]()

This function saves a lot of time over changing individual section of the document, which can be vital if you’re working to a deadline.
4. Shortcuts
In the tip above, we briefly touched on how to apply a Windows shortcut to your document (shortcuts should work on all Microsoft programs, as well as on your internet browser).
It’s all in the name – shortcuts are an effective way to get things done quickly and efficiently.
Here are a number of handy shortcuts that are particularly useful when copywriting:
- Ctrl + c (copy) – allows you to “copy” a piece of highlighted text.
- Ctrl + p (paste) – allows you to “paste” a piece of text that you have previously copied.
- Ctrl + x (cut) – allows you to “cut” a piece of text, which means it will be removed from the document, but saved to your clipboard and ready to “paste” elsewhere, multiple times if necessary. This is particularly useful when you’re restructuring a piece of content.
- Ctrl + a (select all) – allows you to highlight all the content within a document, which you can then copy, cut, or change the size or font of.
- Ctrl + f (find) – allows you to search for particular letters, words, or sentences to help you find and evaluate your use (and placement) of language within a piece of content.It’s also handy if you’re optimising your work with particular keywords, to ensure that you aren’t adding too many instances of the same keyword (“keyword stuffing”) or making the placement of them too unnatural.
- Ctrl + i (italics) – allows you to start writing in, or change a highlighted piece of text to, italics.
- Ctrl + b (bold) – allows you to start writing in, or change a highlighted piece of text to, bold.
- Ctrl + k (hyperlink) – allows you to insert a “hyperlink” on a highlight piece of text. This is useful when you want to externally link to a relevant page and justify quotes or comments that you’re referencing from a particular source.
- Ctrl + s (save) – allows you to quickly “save” your work – keep doing this to ensure that none of your work gets lost!
- Ctrl + p (print) – allows you to “print” your work when you have finished a draft or need to review it off-screen.
- Ctrl + z (undo) – allows you to “undo” your latest action in case you make a mistake or change your mind when performing an action.
There are many other shortcuts, however I’ve only listed these ones as they are, in my opinion, the most useful.
5. Letter casing
If you have a large amount of text that needs to be capitalised, sentence-cased, uppercased or lowercased, you can highlight the text and change it at the click of a button.
This can help you avoid having to manually delete and rewrite the text again – which can be a hassle if you have limited time, or if you need to remember the deleted words that need writing out in new casing.
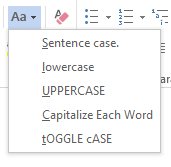
Firstly, highlight a section of text, then click the “Aa” button, and simply select the option that applies to you.

You can do this multiple times throughout the document with the option you need at the given time (although I haven’t required the effects of ‘tOGGLE cASE’ so far!)
Content is king
We hope that you’ve learnt something new from this article, and we hope these selected tips will help you use Microsoft Word to write and edit content in an easier, more efficient way in the future.
Need assistance with your content strategy? Get in touch with the Coast team today and discover how our content specialists can help!